Forsythia
Watercolor Sketching Tutorial

by Jennifer Branch
YouTube Watercolor Painting Tutorial

Spring into sketching with this easy forsythia (or yellow bells) sketch! The entire watercolor painting only takes 20 minutes (shortened in the video), drying time included.

These gorgeous flowers are in my front garden, taking over a hill. When I just have a few minutes to paint I love going in my garden and sketching. Every time I sketch I learn something. It actually took 2 tries to get a sketch I was happy with, but that's part of the joy of sketching.

Any flowers blooming near you will work for your sketch. You're just painting a burst of color!

This is a quick easy painting to celebrate spring!

Forsythia Watercolor Painting tutorial


Sketching Tutorial Level

Beginner
Intermediate

Skill Building

Vivid Colors

Texture

Art Supplies

6" x 8"
Twinrocker Cold Press

Cheap Joes Rigger, no.1
Blick Art Full Bellied Round, no.12

Paints

M. Graham watercolors

Azo Yellow
Cadmium Yellow
Quinacridone Red
Nickel Azo Yellow
Ultramarine Blue
Viridian
Cobalt Violet
Burnt Sienna
White Gouache
Wax Crayon

Painting Demonstration 1

Forsythia Watercolor Painting Lesson 1

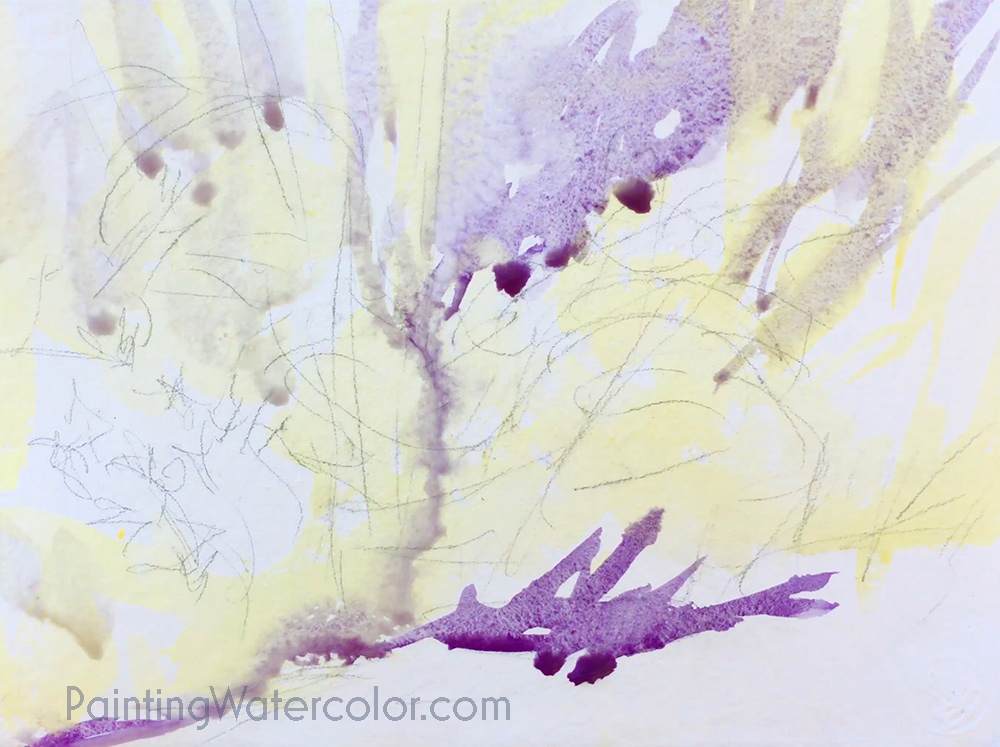
After I've drawn the big shapes, I reserve a few whites with a wax crayon.

I begin painting with a very loose wahs of cadmium yellow and cobalt violet. I use cadmium yellow because of the orange hue.

Painting Demonstration 2

Forsythia Watercolor Painting Lesson 2

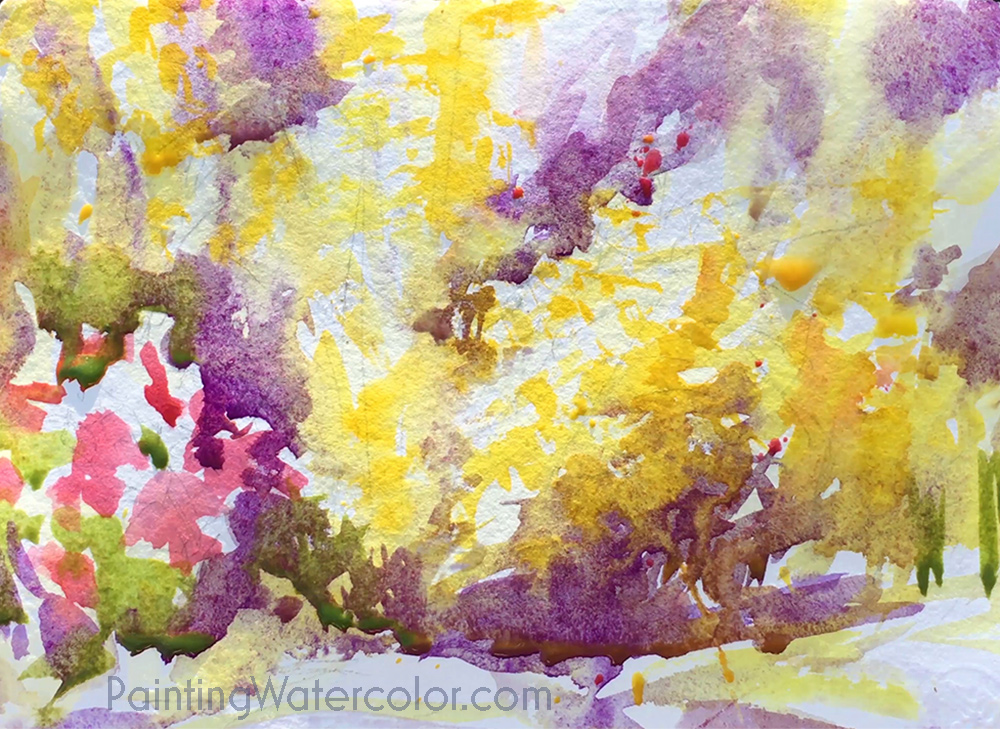
While everything is drying in the sun, I play around with more colors, letting them flow together. I'm still focusing on painting the big shapes. I'm not worried about details yet.

Painting Demonstration 3

Forsythia Painting Tutorial 3

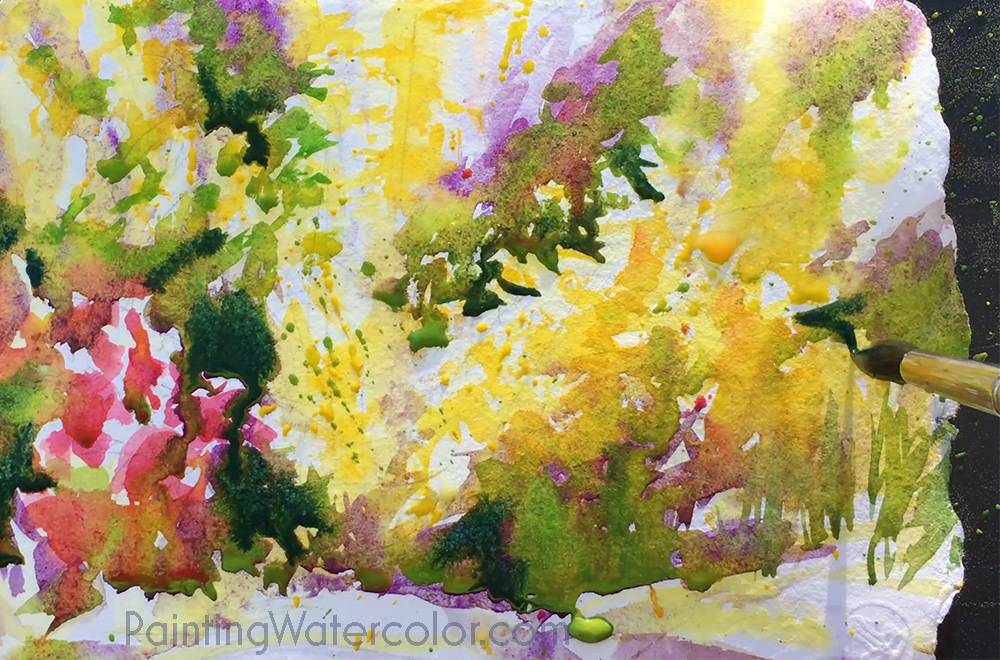
I always mix green with another color or two. This green is mostly viridian mixed with azo yellow and nickel azo yellow.

Don't forget to splatter paint!

Artist Tips

Just paint the big shapes. Leave details until the end.
Forsythia watercolor painting tutorial by Jennifer Branch

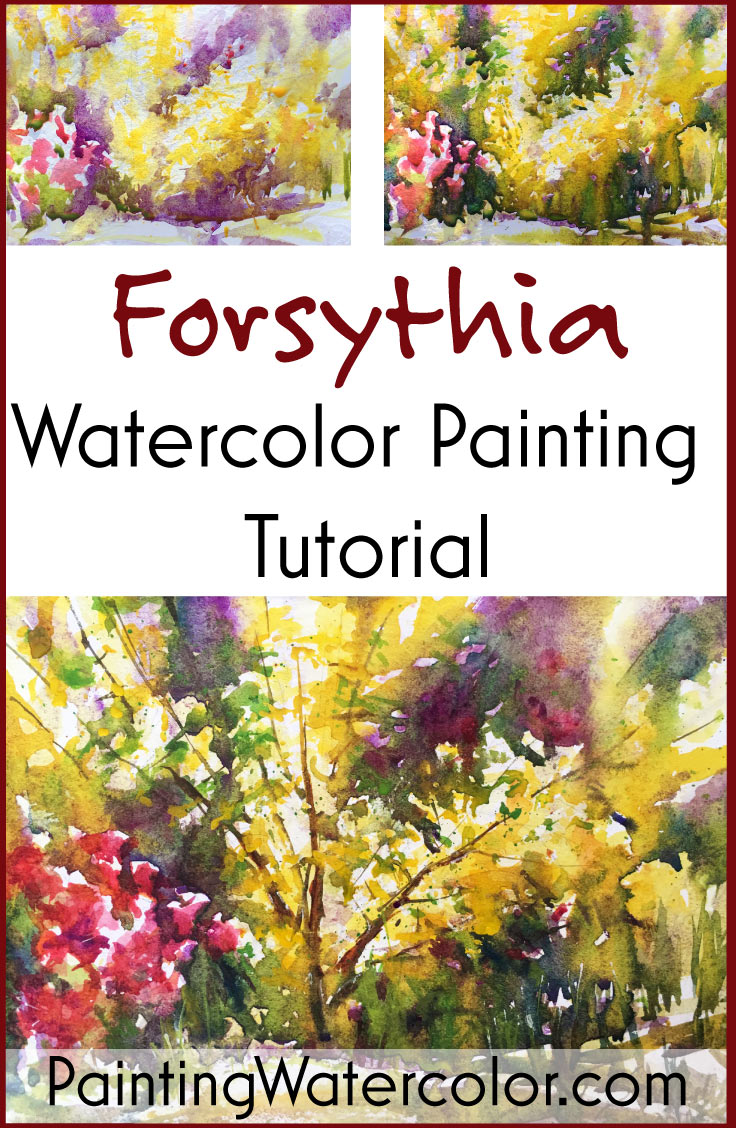
Painting Demonstration 4

Forsythia Painting Tutorial 4

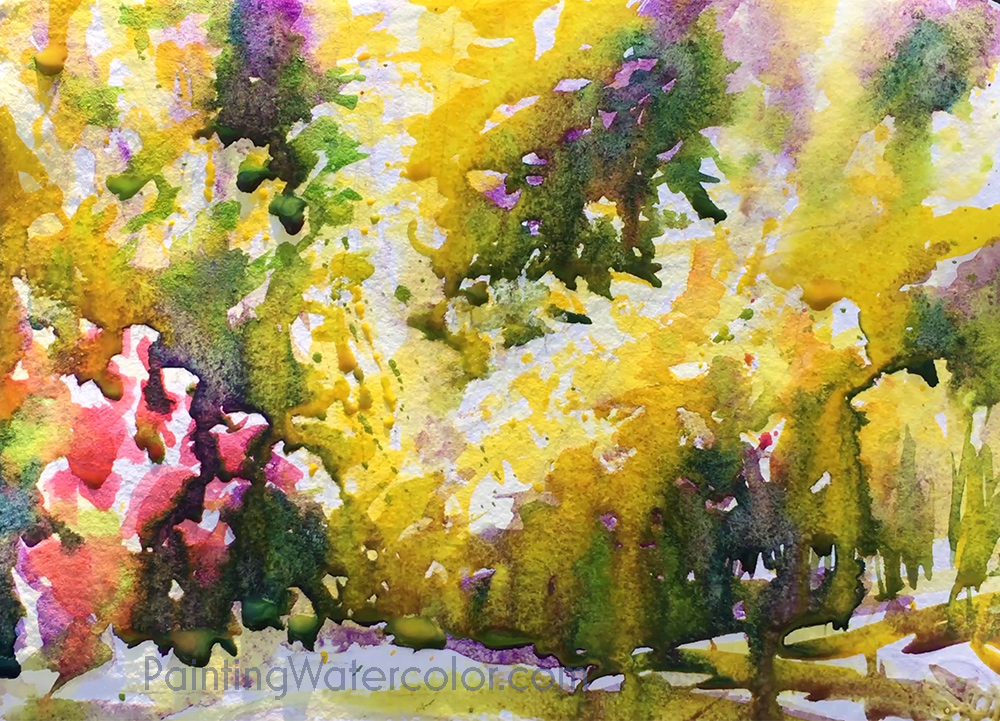
This is such a loose painting, so keep it loose! Let the colors flow into one another and repeat in the background.

Painting Demonstration 5

Forsythia Painting Tutorial 5

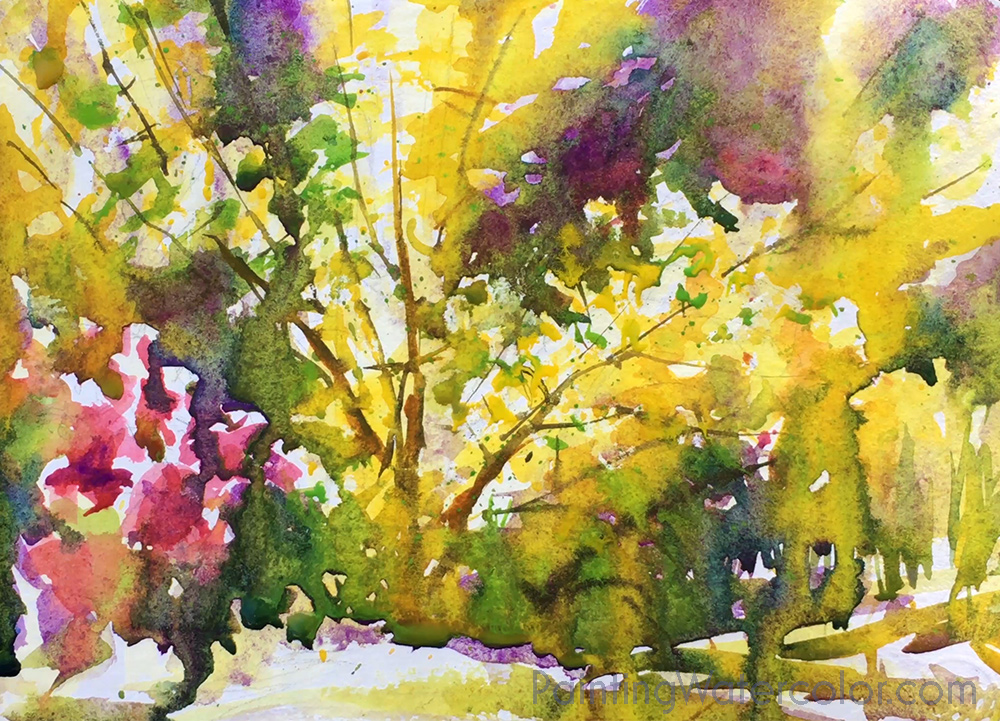
Now it's time to add the little details. I use a rigger brush for the small things, loosely sketching the framework of the forsythia and adding a few extra blossoms.

I use heavy dabs of cadmium yellow - near opaque when applied thickly. I want to loosen up the negative painting, blur the edges.

Forsythia Watercolor Painting tutorial

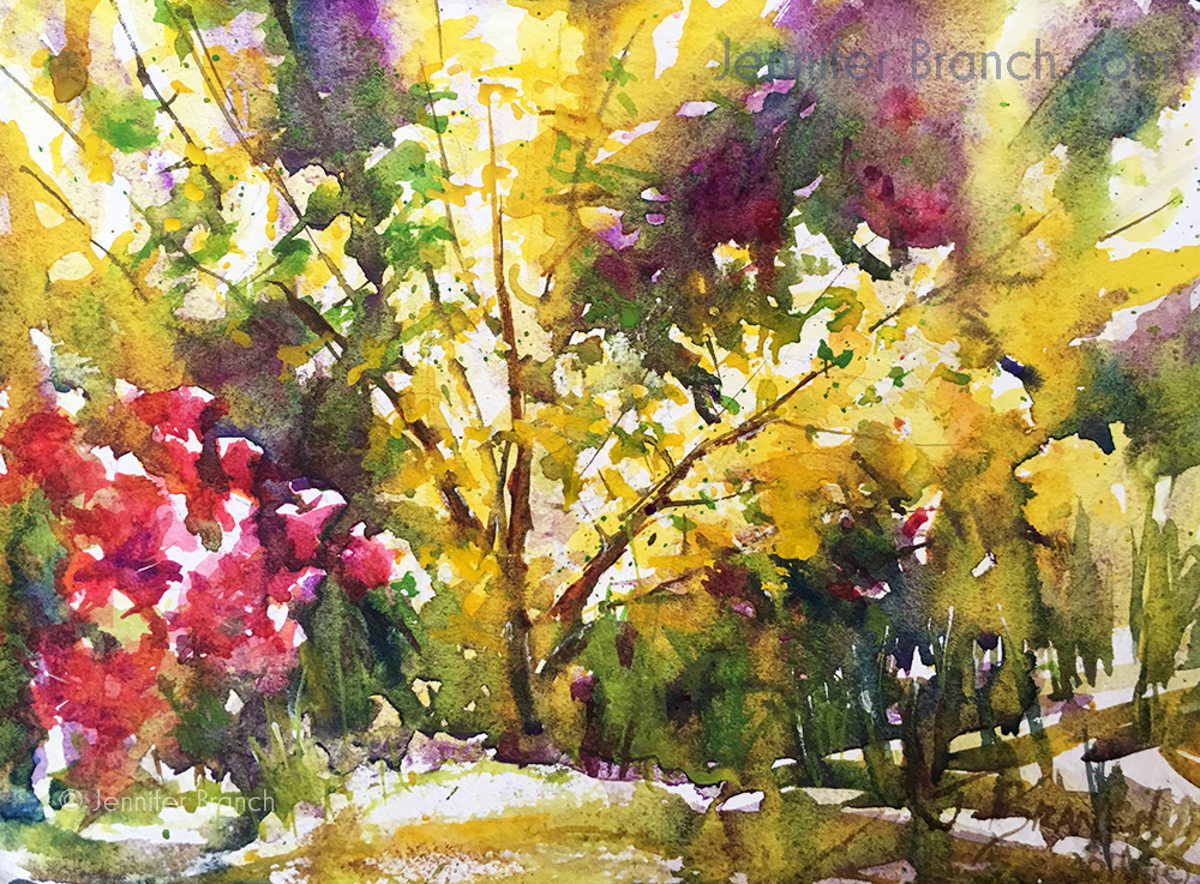
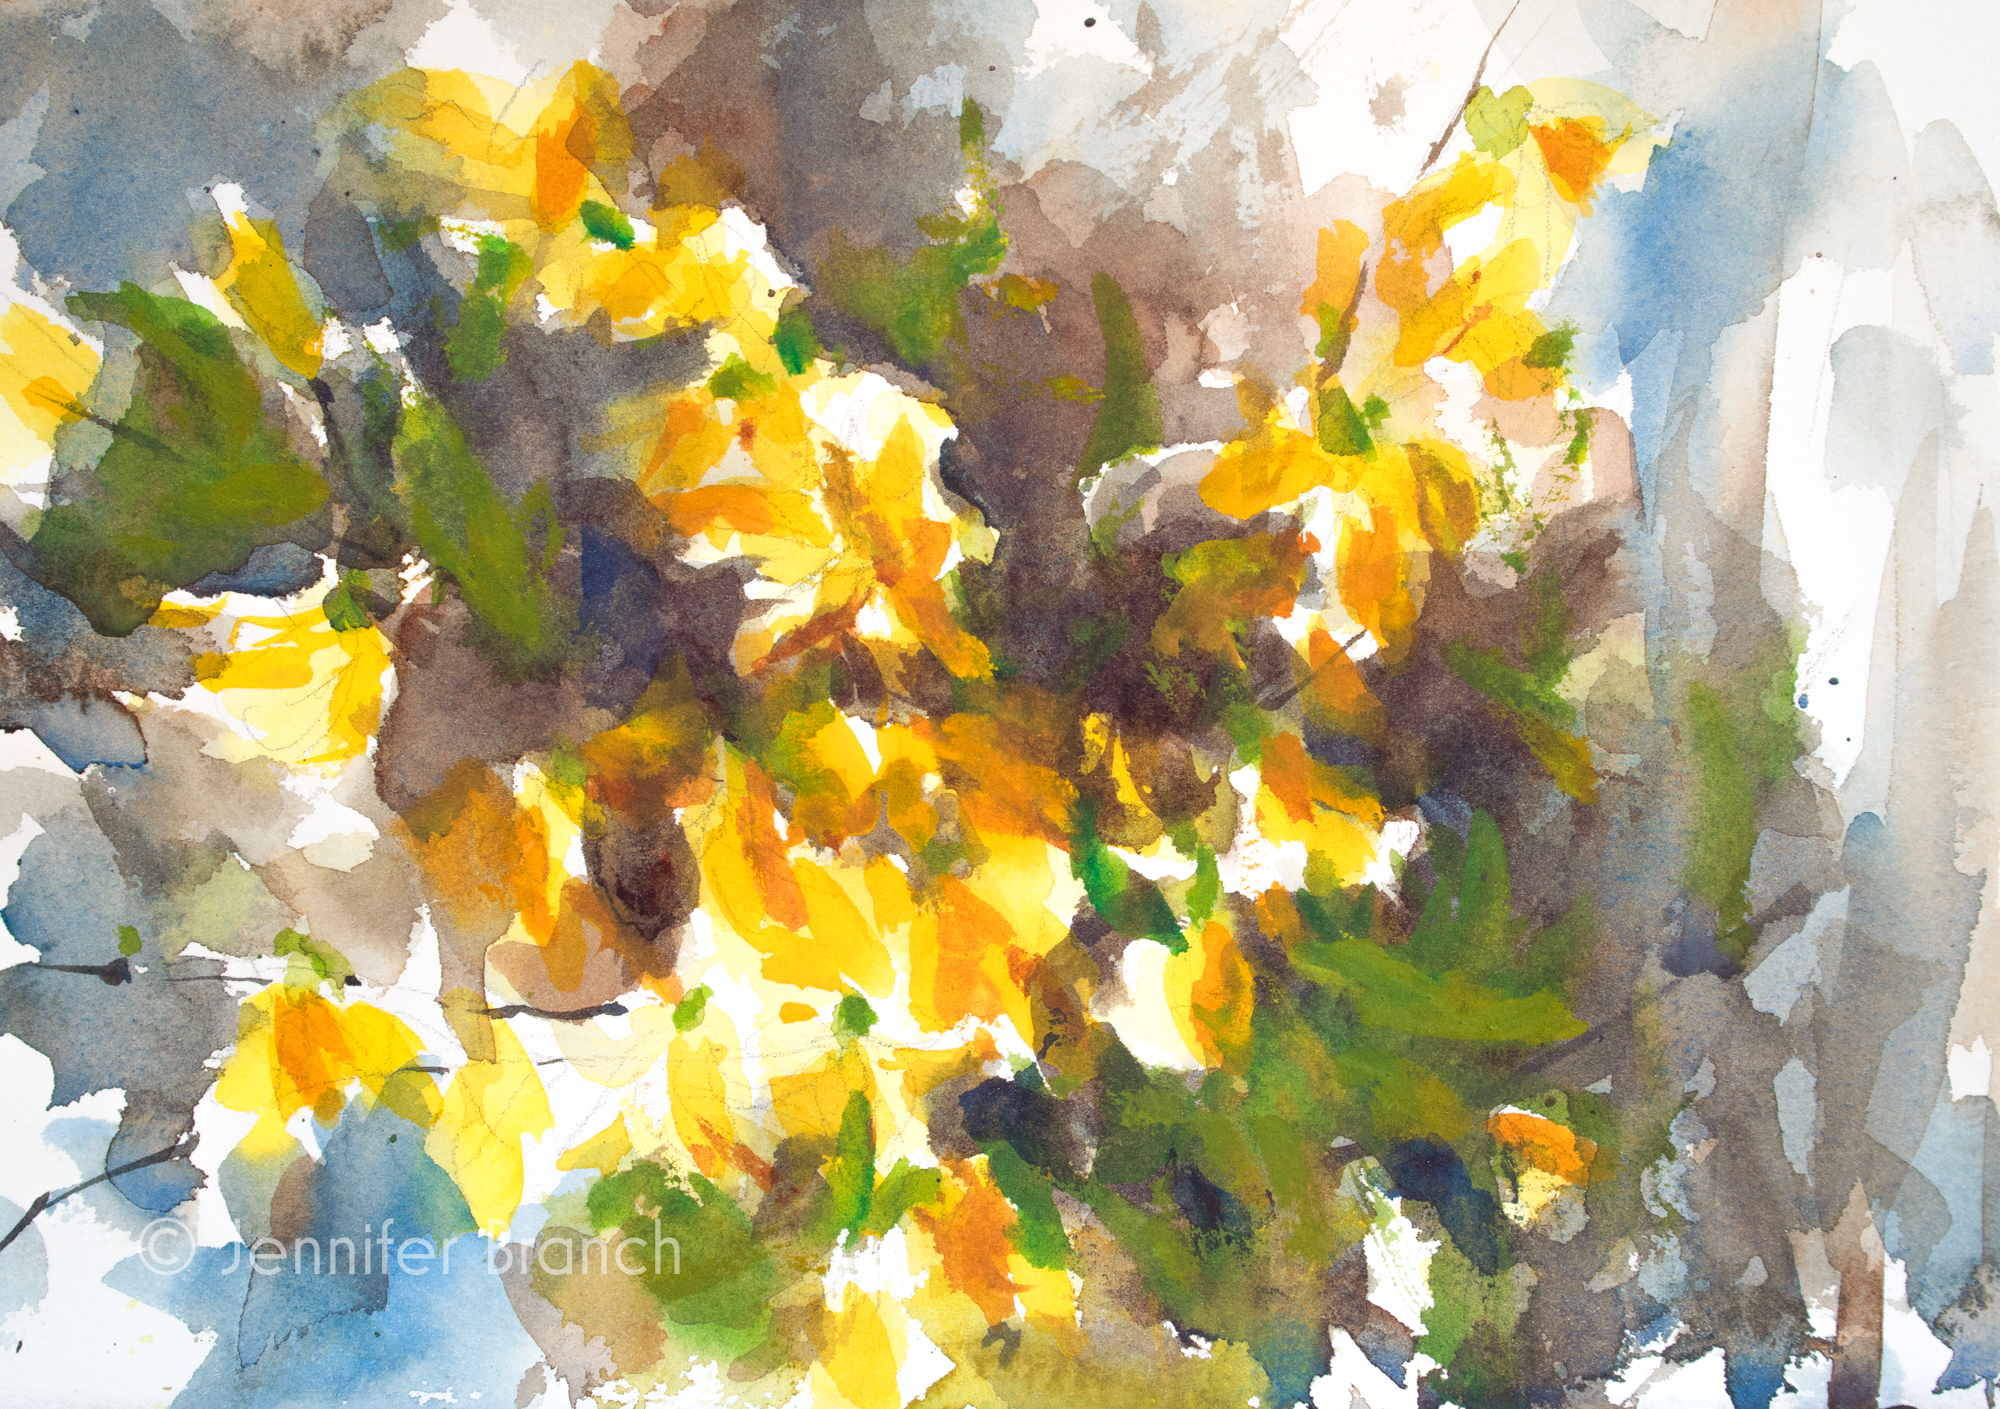
Final Watercolor Sketch!

I add a few more details (and splatter paint.) I pull out a few highlights and also use white gouache for a few highlights. The combination adds a lot of texture.

I loved painting the forsythia this year. I only had time for two sketches, but I'm happy with them. I'd probably paint a few more sketches but it's raining today. The blossoms will droop and the greens will overtake the yellow.

Time to more on to dogwoods and azaleas!

I hope this inspires you to paint whatever flowers are in bloom in your own garden!


Happy Painting! Jennifer Branch

Related Art Lessons

  • Forsythia Sketch Painting Tutorial watercolor painting tutorial
    Forsythia Sketch Painting Tutorial

  • How to Use Wax Resist watercolor painting lesson
    How to Use Wax Resist

  • Southwest Harbor Dinghies Reflections watercolor painting tutorial
    Southwest Harbor Dinghies Reflections

  • 5 Beginner Watercolor Painting Fixes watercolor painting lesson
    5 Beginner Watercolor Painting Fixes